Support Center

Frequently asked questions and support documentation for RatingWidget.

Results

  • How can I customize the ratings image / theme in WordPress?

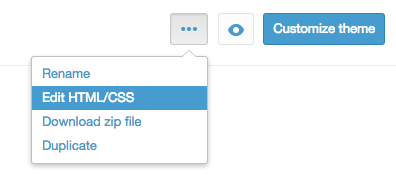
    First, go to http://rating-widget.com/contribute-rating-design/ and create a custom design sprite according to the design instructions. Then, upload your sprites to your host (so it could be access via url address). Finally, open your WP management dashboard. There, open the ratings settings and select the rating type you would like to customize. Now, scroll to the bottom and activate the Power User Settings. Paste the following code into the box to set up the new design:

    options.style = RW.CUSTOM;
    options.imgUrl = {
        ltr: "http://imageaddress.com/img.ltr.png",
        rtl: "http://imageaddress.com/img.rtl.png"
    };
    

    Notice: Custom ratings design is only supported in our Professional and Business plans.

  • How can I add a price tag to my Shopify’s store Rich-Snippets?

    It’s fairly very simple task. Open your product template liquid in the editor, and add the schema.org/Offer metadata:

    <div itemprop=”offers” itemscope itemtype=”http://schema.org/Offer”>

    <span itemprop=”price”>{{ product.variants.first.price | money }}</span>

    <meta itemprop=”priceCurrency” content=”{{ shop.currency }}” />

    <meta itemprop=”availability” content=”in_stock”/>

    </div>

  • Can I add a rating inside my WordPress post’s content?

    We created a special shortcode you can use inside your posts / pages editor.

    For post ratings:

    • Current post rating - [ratingwidget]
    • Specified post rating - [ratingwidget post_id=123]

    For page ratings:

    • Current page rating - [ratingwidget type="page"]
    • Specified page rating - [ratingwidget type="page" post_id=123]

    For random ratings (not bound to any page/post):

    • Rating - [ratingwidget_raw id="1" title="my-title" type="page"]

    Rich-Snippets support:
    If you are using our Professional or Business plan which supports Rich-Snippets integration, and you want that the rendered rating will have the relevant schema, please add the add_schema=true attribute to the shortcode. For example:
    [ratingwidget post_id=123 add_schema=true]

    Note: If you already have a rating with schema.org on the same page, adding additional rating with schema.org metadata will confuse search engines, and will cause your ratings disappear from SERP.

  • Is there any PHP shortcodes I can use for my custom posts templates?

    We created several custom PHP shortcodes to make it easy for you adding RatingWidget into your custom templates or even if you want to customize the exact location of the ratings in your pages.

    Here are the shortcodes:

    • Output post / page / comment rating:
      function rw_the_post_rating($postID = false, $class = 'blog-post', $schema = false);
    • Return post / page / comment rating:
      function rw_get_post_rating($postID = false, $class = 'blog-post', $schema = false);
    • Output user rating:
      function rw_the_user_rating($userID = false);
    • Return user rating:
      function rw_get_user_rating($userID = false);

    Usage example:

    <?php rw_the_post_rating(14, 'front-post'); ?>

    Params:

    • $postID – The post id. Defaults to current’s loop post id.
    • $class - Rating class/type. For front page posts use ‘front-post’, for posts use ‘blog-post’, for pages user ‘page’, for comments use ‘comment’.
    • $schema - If TRUE, add Rich-Snippets schema.org metadata (only for Professional customers).
    • $userID - User ID. Defaults to current’s loop user.

    You can find the shortcodes implementation in /rating-widget/lib/rw-shortcodes.php

  • What is the difference between bbPress Forum Posts and Activity Forum Posts?

    When using bbPress together with BuddyPress, forum topics & replies posting are automatically generating activity updates for BuddyPress’ users activity feed. We call these activity updates - Activity Forum Posts. For maximal customization flexibility, we allow admin’s to customize the ratings style for each view so bbPress forum ratings in the activity feed can look different from the ratings in the forum section.

  • How do you identify the visitor / voter?

    In order to prevent from multiple votes from the same visitor (check out the topic about voting frequency here), our default identification technique is cookies. We leverage both regular HTTP cookie and LSO (Local shared object a.k.a  Flash Cookie) to uniquely mark the visitor’s device. As you probably figured out, it’s very simple to clean your cookies or use incognito mode, to actually make more than one vote from the same device. Thus, if fraud votes is a critical issue for you, our premium product support additional identification methods:

    1. By IP: These visitor identification method means that by default only one vote can be contributed from the IP. The advantage of this method is that it’s much harder to change IPs than cookies (requires some hacking skills but possible using proxies, etc.). The disadvantage is that different visitors who are using the same NAT (E.g. same router device), won’t be able to vote more than once.
    2. By Login: We provide a very useful JavaScript callback called beforeRate, you can use it to force a login to your site before being able to rate. Note: These method is also not 100% safe and could be hacked.
    3. By Social Login: Before a visitor can rate, he is required to connect his social identify with RatingWidget (currently we’ve implemented Facebook Connect). We believe this is the most safe identification method for many reasons. The main one is that in order to make fraud/fake vote – it requires a new social identity (creating of social identity takes time, requires unique email, etc.). The disadvantage of this method is that it significantly reduces the number of votes (some people don’t like to connect their social identity with external services).
  • Can I contribute my own stars design so you can upload it for everyone?

    Hell Yeah! It’s always awesome that our community contribute designs. Because of cool people like you we have the largest ratings themes collection on the web! Before you send it to provision at [email protected], please make sure the design is built correctly with the help of this page:
    http://rating-widget.com/contribute-rating-design/

    We are looking forward to see your design!

  • Do you have a refresh code for Ajax loaded content?

    In order to refresh / re-render the ratings on the page all you need to do is execute the following JavaScript line.

    RW.render(null, true);

    You can add the following code snippet right before your closing </body> tag (requires jQuery support) and it will automatically do the job.

    <script type="text/javascript">
        (function($){
            $(document).ajaxSuccess(function() {
                setTimeout(function(){
                    if ("undefined" !== typeof(RW))
                        RW.render(null, true);
                }, 500);
            });
        })(jQuery);
    </script>

    If you care about efficiency, call this method only after you add new ratings’ HTML containers (not on every Ajax call).

    Using the WordPress Plugin?

    To add the snippet right in your WordPress’ footer, add the following code to your theme’s functions.php file:

        /* Append ratings render-er after ajax call.
        ------------------------------------------*/
        function rw_render_ratings_after_ajax()
        {
    ?>
    <script type="text/javascript">
        (function($){
            $(document).ajaxSuccess(function() {
                setTimeout(function(){
                    if ("undefined" !== typeof(RW))
                        RW.render(null, true);
                }, 500);
            });
        })(jQuery);
    </script>
    <?php        
        }
    
        add_action('wp_footer', 'rw_render_ratings_after_ajax');
    
  • How to show the ratings in Shopify Product Collection pages?

    By default, RatingWidget for Shopify app will show the ratings only on Product Pages. With some minor tweaks in you theme’s template, you can easily add the ratings to your Product Collections.

    • Open Shopify’s admin dashboard and go to Themes. There, click Edit HTML/CSS to open the template editor:
      Shopify Template Editor Button
    • In your editor, expand the Snippets directory and select rw-js.liquid.
      Now, simply change the first line of code:

      {% if template contains 'product' %}

      to this code:

      {% if template contains 'product' or template contains 'collection' %}

      This will load the ratings on product and products collection pages.

    • Now, to embed RatingWidget to your Collection pages, find the liquid file that is responsible for the collection template (the template file may have different names depending on the theme you are using, but usually it’s named collection.liquid). There, add the following ratings snippet exactly where you want the ratings to appear:
       {% include 'rw-rating' %} 

    Wasn’t that simple?! If you have no clue about coding or liquid files modification, feel free to contact us. Our Shopify experts would be happy to do it for you for a symbolic setup fee.

  • How to disable product voting for NON logged customers?

    If you want someone to log into their Shopify account before they can rate your products, simply follow these steps:

    • Log into your store’s Management Dashboard and open your Template’s Editor:
      Themes -> Customize theme -> Edit HTML/CSS.
    • There, find Snippets/rw-settings-custom.liquid and click it.
    • Add the following code:
      {% if customer %}{% else %}
          settings.options.readOnly = true;
      {% endif %}
      
    • Now Save the file and you done :)

    If you have no clue about coding or liquid files modification, feel free to contact us. Our Shopify experts would be happy to do it for you for a symbolic setup fee.

  • How to hide the content recommendations shown in the after vote report popup?

    To disable recommendations shown in the report popup, simply add this code snippet

    "hideRecommendations": true,

    to your existing integration code options. Your new integration code should be something like:

        ...
        options: {
           "hideRecommendations": true,
           "size": "medium",
           "style": "oxygen",
        }
        ...
    

    WordPress Plugin User?

    • Go to Dashboard > RatingWidget
    • Select the rating type tab you’d like to modify
    • Scroll to the bottom of the setting page until you get to the Power User Settings
    • Check the Activate / in-activate checkbox to activate the Power User Settings.
    • By default, the hideRecommendations option will already be there as one of the examples:
      options.hideRecommendations = true;
    • Delete all other preset functions if not needed or modify when necessary. Then click Save Changes and you’re all set!